

Have you ever felt overwhelmed by an unorganized Gmail inbox? Do you yearn for a better way to sort, filter, and manage your daily barrage of emails? Well, buckle up because we’re about to embark on a journey into the world of Gmail, revealing 10 Mind-Blowing Gmail Tricks You Never Knew to help you conquer your inbox chaos.
Understanding the Concept of Inbox Zero
Did you know that the concept of Inbox Zero isn’t about having zero emails in your inbox? Rather, it’s about reducing the amount of time spent managing your inbox. Now, how can Gmail’s hidden features help us achieve this seemingly daunting task? Let’s dive in!
Getting to the nitty-gritty, it’s time we uncover these 10 Mind-Blowing Gmail Tricks You Never Knew to simplify your email management process.
Table of Contents
- Setting Up Your Gmail Inbox for Success
- Mastering Gmail Search and Filters
- Organizing Emails with Labels and Categories
- Utilizing the Archive Feature Effectively
- Scheduling and Snoozing Emails
- How to Handle Spam and Unwanted Emails
- Creating a Daily Email Management Routine
- The Importance of Regular Email Checking
- Time Blocking for Email Management
- Keyboard Shortcuts for Gmail
1. Setting Up Your Gmail Inbox for Success
Think of your Gmail inbox as your personal assistant. It can organize your emails efficiently so you can focus on what matters most to you. Here’s how to train your assistant (Gmail) to organize your emails:
Access Your Gmail Account
Start by logging into your Gmail account. Type www.gmail.com into your web browser, enter your email address and password, and click “Sign In”. Now you’re ready to begin setting up your Gmail for success!
Navigate to Gmail Settings
Once you’re in your inbox, look at the top right corner of your screen. There, you’ll find a cogwheel icon – this is the “Settings” button. Click on it, and a drop-down menu will appear. From this menu, select “See all settings”.
Switch to Priority Inbox
In the Settings window, you’ll see a row of tabs. Click on the “Inbox” tab. You’ll now see a variety of options for customizing your inbox. The first one is “Inbox type”. Click on the box next to it, and a drop-down menu will appear. From this menu, select “Priority Inbox”.
Configure Your Inbox Sections
Now, it’s time to decide how you want your emails to be organized. Below “Inbox type”, there are several sections that you can customize. Here’s a quick setup that works well:
- In the first section, click on “Options” and select “Important and unread”. This tells Gmail to put all your important and unread emails in this section.
- In the second section, click on “Options” and select “Starred”. This will be the section where all your starred emails go.
- In the third section, leave it as “Everything else”. This is where all other emails will end up.
- You can ignore the fourth section for now. Click “Options” and select “Not used”.
- Save Your Changes
- Now that you’ve told Gmail how to sort your emails, you need to save these settings. Scroll down to the bottom of the page and click the “Save Changes” button.
And that’s it! You’ve successfully set up your Gmail inbox for success. Now, when you go back to your inbox, you’ll see that your emails are sorted into the sections you selected, making it easier for you to manage your emails and achieve Inbox Zero.
Here is a quick way to disable or delete the social and promotions tab in Gmail view.
2. Mastering Gmail Search and Filters
Imagine your Gmail inbox as a massive library and each email is a book. Now, finding the exact book (email) you need from this library can sometimes be tricky, but thankfully, Gmail has given us some cool tools like Search and Filters. They’re like your personal librarian who knows exactly where everything is. Let’s learn how to use them!
Gmail Search – The Quick Librarian
When you log into your Gmail, you’ll see a search bar at the top. Here, you can type anything – a name, an email address, or a word that you remember from the email, and Gmail will quickly find emails that match your search. It’s like asking your librarian, “Hey, can you find me that book about Gmail tricks?”
Advanced Search – The Expert Librarian
Sometimes, the basic search might not be enough. That’s where Advanced Search comes in. This is like your expert librarian.
- To access it, click on the small down arrow on the right side of the search bar. A box with multiple fields will drop down.
- Here, you can search with more specific details like “From” (who sent the email), “To” (who received the email), “Subject” (what the email is about), or “Has the words” (specific words in the email).
- You can even search for emails within a certain date range, or look for emails with attachments.
Creating Filters – Your Personal Sorting Librarian
Now, what if you could train your librarian to automatically sort your new books (emails) as they come in? That’s what Filters do.
- To create a Filter, go to “Advanced Search” (the small down arrow in the search bar).
- Fill in your specific details like you did before, for example, all emails from “newsletter@easytechhacks.com”.
- Then, instead of hitting the “Search” button, click “Create filter”.
- Now, you’ll see a list of actions your filter can take. For example, you can make all emails from “newsletter@easytechhacks.com” skip your inbox and go straight to a specific folder. Just tick the boxes that match what you want, and then click “Create filter”.
And there you have it! By mastering Gmail Search and Filters, you’ve made your inbox smarter and your email life easier. It’s like having the best librarian ever right in your inbox!
3. Organizing Emails with Labels and Categories
Ever had a messy room with stuff all over the place, and your mom told you to tidy it up? Well, think of your Gmail Inbox as your room. Sometimes it can get cluttered with emails (or stuff) and it’s important to tidy it up. The tools we use for that are Labels and Categories.
Creating Labels – Your Personal Shelves
Labels are like the shelves or boxes in your room where you put similar stuff together. Let’s learn how to create them:
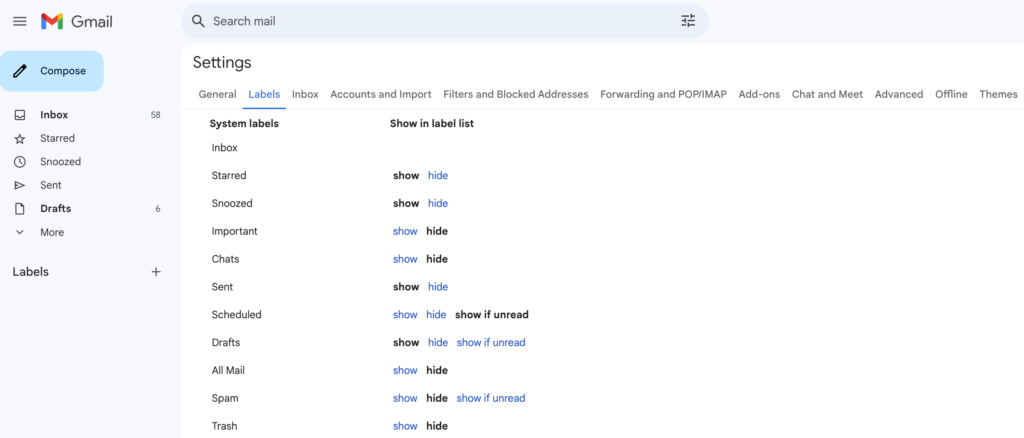
- On the left side of your Gmail inbox, you’ll see a list of words: Inbox, Starred, Snoozed, and so on. Scroll down that list until you find “More”. Click on it.
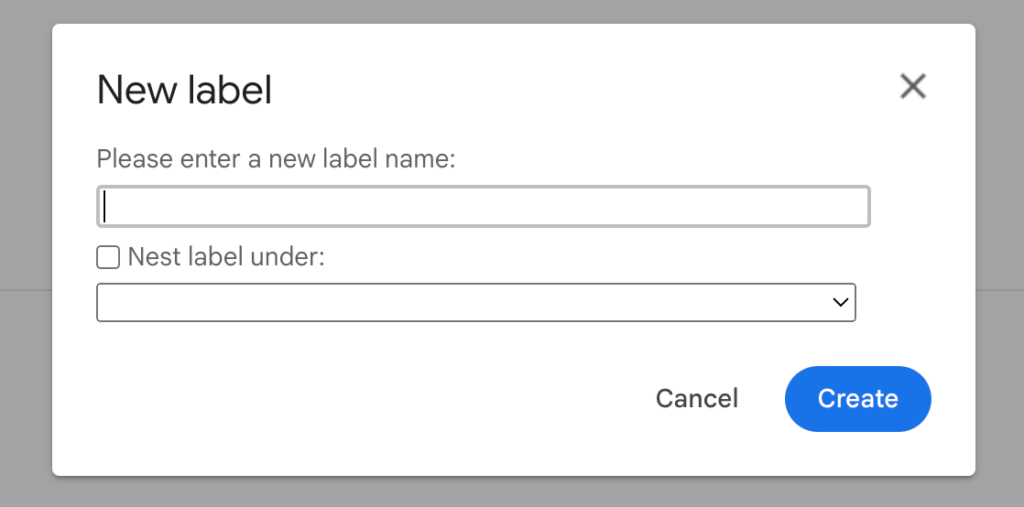
- Scroll down a bit more and you’ll find “Create new label”. Click on it.
- A box will pop up asking you to name your label. Type in the name you want, like “School”, “Friends”, or “Games”, then click “Create”. Now you have your own personal shelf!
Using Labels – Putting Stuff on Your Shelves
Now that you have your shelves (labels), let’s put some stuff (emails) on them:
- Open an email you want to put on a shelf.
- At the top of the email, you’ll see an icon that looks like a tag. Click on it.
- A list of your labels will appear. Click on the label you want to use. You can also tick multiple labels if you want.
- Your email will now show a color-coded tag with the label’s name. It’s on the shelf now!
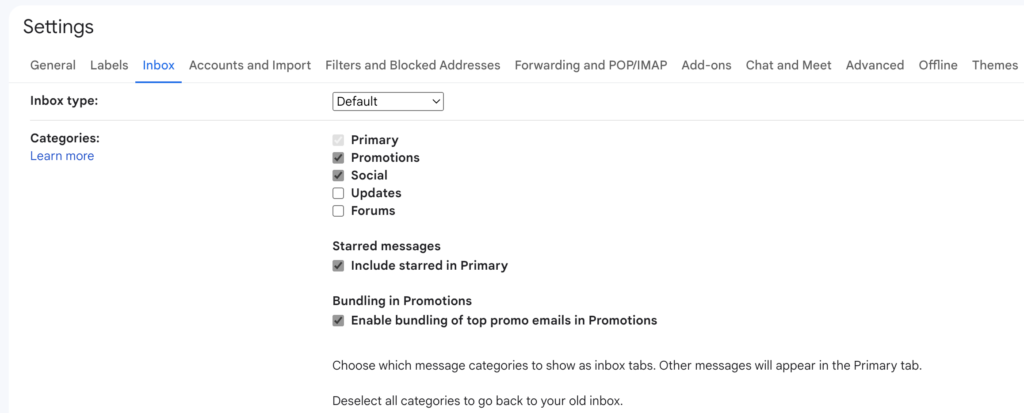
Understanding Categories – Bigger Shelves
Categories are like bigger shelves. Gmail automatically sorts some of your emails into five categories: Primary, Social, Promotions, Updates, and Forums. Here’s how to use them:
- Click on the cogwheel (Settings) at the top right of your screen, then “See all settings”.
- Click on the “Inbox” tab, then scroll down to “Categories”.
- Here you can choose which categories you want to use. Gmail will automatically sort your emails into these categories.
- Back in your inbox, you’ll see these categories as tabs at the top. Click on a tab to see all the emails in that category.
That’s it! Now your room (inbox) is tidy and it’s easier to find your stuff (emails). Remember, you’re in charge here. If you want to rename, remove, or create new labels and categories, you can. So, happy organizing!
4. Utilizing the Archive Feature Effectively

Do you have a ton of emails in your inbox, but you don’t want to delete them? Just like you put your old stuff in a box and store it in the attic, you can ‘Archive’ these emails.
- Open the email you want to archive.
- Look at the top of the screen, there is an icon that looks like a box with a down arrow – that’s the “Archive” button. Click on it.
- Your email is now archived! Don’t worry, it’s not gone.
- Just click on the “All Mail” label on the left side, and you’ll see your archived emails.
5. Scheduling and Snoozing Emails

Scheduling is like telling Gmail, “Hey, can you send this email for me tomorrow morning?” And ‘Snooze’ is like saying, “I don’t want to see this email now, show it to me later.”
Scheduling and Snoozing Emails
- Click the “+ Compose” button to start a new email.
- Write your email like you usually do.
- Instead of clicking “Send”, click the little arrow next to it, and then “Schedule Send”.
- Pick a date and time, then click “Schedule Send”. Your email will be sent at that time.
Snoozing Emails
- Hover over the email you want to snooze. You’ll see several icons pop up.
- Click the clock icon – that’s the “Snooze” button.
- Pick a date and time, then click “Snooze”. Your email will disappear and reappear at that time.
6. How to Handle Spam and Unwanted Emails
Getting too many annoying or unwanted emails? Let’s get rid of them!
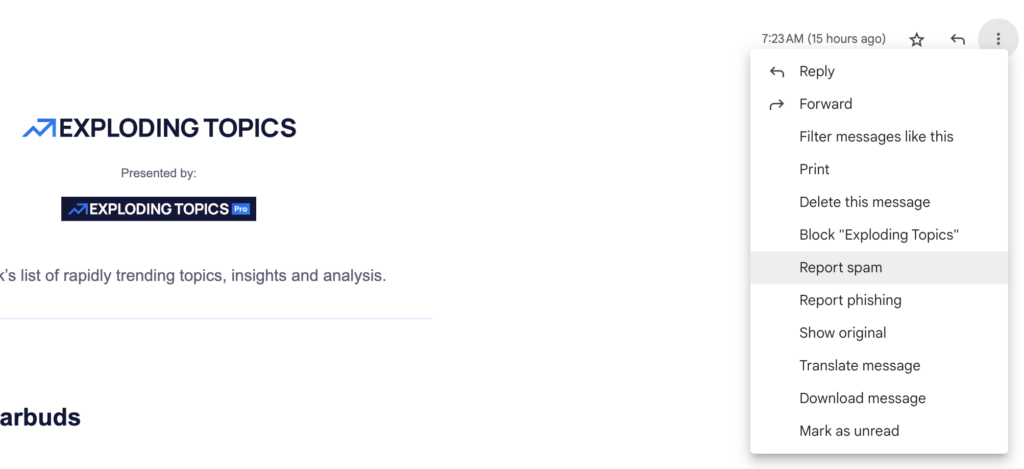
- Open the spam or unwanted email.
- At the top, you’ll see a “Report spam” button (it looks like a stop sign with an exclamation mark). Click it. This moves the email to your Spam folder.
- Also, look for an “Unsubscribe” link usually at the bottom of the email.
- Click it to stop receiving these emails in the future.
7. Creating a Daily Email Management Routine
Just like you have a routine for school or chores, you can have a routine for your emails too.
Set specific times to check your emails, like after breakfast and before dinner.
During these times, read your new emails, reply if needed, archive old emails, and report spam.
8. The Importance of Regular Email Checking
If you don’t check your emails regularly, they’ll pile up and become overwhelming. So, make it a habit to check your emails at least twice a day.
9. Time Blocking for Email Management
Don’t let emails distract you all day. Set specific ‘blocks’ of time for your email checks, like 4-4:30 PM.
Close your Gmail tab when it’s not your email time.
When it’s your email time, focus only on your emails. Reply, archive, report spam, and then close your Gmail tab again.
10. Keyboard Shortcuts for Gmail

Keyboard shortcuts are like secret passageways in a video game that help you get to your destination faster. Here’s how to enable and use them:
- Click the Settings gear at the top right of Gmail, then click “See all settings”.
- Under the “General” tab, find “Keyboard shortcuts” and select “Keyboard shortcuts on”.
- Click “Save Changes” at the bottom.
- Once they’re enabled, you can use these shortcuts:
- Press “c” to start composing a new email.
- Press “e” to archive an email.
- Press “#” to delete an email.
- Press “r” to reply to an email.
- Press “/” to jump to the search box.
Congratulations! You’re now a Gmail power user! Do you have any questions or need more help? Just ask.


